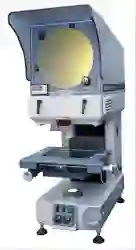
Profile projectors, also known as optical comparators, are precision measurement tools used for inspecting the dimensions and contours of various manufactured parts. They work based on the principle of optical magnification and comparison. Here's how a profile projector typically works: Light Source: A profile projector typically uses a powerful light source, often an intense halogen or LED lamp, to illuminate the part being inspected. Lens System: The illuminated part is then magnified using a lens system. This magnification allows for detailed observation of the part's features. Stage: The part to be inspected is placed on a stage, which usually has a glass plate with marked lines for reference. The stage can be rotated and moved in different directions to facilitate viewing of the part from various angles.
- S M Engineers Sales And Services Pvt. Ltd.
- 0
- New
- Machinery